Tuesday, December 29, 2015

Onward and upward

I find that my so-called "idle" moments are when most of the groundwork for my next steps are laid. I was taking an introvert break from a party at church, and found a couple of books in the church library that are proving very timely.

One was the biography of Amy Carmichael by Frank Houghton, where I found a very remarkable item from this woman who became a mother to many. In her words:
You may hear of a bad night, and of a very difficult thing that has to be done today--something that will call for spiritual energy, for the human will be useless.  I want you to know that if this has to be so, all is well.  For many years I have almost every morning "remembered His death"--a morsel of bread, a few drops of water (He still turns water into wine)--and something happens.  I can't say more, only I am conscious of life received....I have marked this letter "private", as to talk of it, even to write of it, is rather like pulling the petals off a flower.
The other was a book by Catherine Marshall, Meeting God at Every Turn, that I first read several years ago. This reading gave me a straight answer to a spiritual question that I've been chewing on for a while. A helpful quote on another topic:
Reckon without God?  We'd better not, not in any area of life, if we are serous about knowing reality and about achieving our full potential.  For our God never considers our work as merely a way to earn a living--so much an hour, so much a year.  He has given each of us the gift of life with a specific purpose in view.  To Him work is a sacrament, even what we consider unimportant, mundane work.  When done "as unto the Lord," it can have eternal significance.
It is therefore important to Him that we discover what our particular aptitudes and talents are; then that we use those talents to His glory and their maximum potential during our all-too-brief time on earth.  
Catherine Marshall also had a lot to teach about hearing and following the Holy Spirit; our church small group is working through a book on the Spirit.

In more practically-oriented news, I was going to use a piece of scrap pine to make a row of coat hooks by the front door. But then I was inspired to think of a wrought iron rack, which would fit in better with the decor...and I realized that I didn't have to make one, we actually had a small one already, in the garage. (Well, fake wrought iron; cast iron from the Seventies.) It took only a few minutes to put it up with wall anchors and screws.

Monday, December 21, 2015

Simple joys and keeping things going


As you can see, I finished my Christmas sign painting on a drawer bottom. I learned that it is best to choose a single, short word, to use a wide brush to make a minimal number of careful strokes per letter, and then to leave it at that. (At least if you are lefthanded and terrible at hand lettering, as I am.) I'm not a big fan of the "words on walls and everything else too" trends of recent years, but I am happy with how this turned out.

Other projects include:

Cleaning and oiling my leather boots with neat's foot oil. Maintenance is very important and it is so often overlooked....I'm pretty sure the primary reason the previous owners of this house moved was that they didn't want to deal with the accumulating deterioration; they did some quick repairs and cosmetic upgrades to get the house sold, and left. Our landlord did some more updating, and has started working through the maintenance backlog, but there are still several expensive (non-urgent) projects that need to be done.

Knitting new dishcloths for myself and for gifts; my husband finally found the box of yarn that was "lost" in the move. These dishcloths will last several years, easily; it is washing our serrated knives that wears them out in the end.

Deciding how to assemble and finish the chair I'm building. I found some paint remnants at the Habitat for Humanity ReStore, which I had a coupon for, and my husband brought home some free rope scraps that may be usable.

Re-reading my sewing machine's user manual and sewing guide. I found an older speed sewing book at the thrift store; the book was good, but half of it boiled down to "read your sewing machine's manuals!". So I did, and learned a lot more about what my machine can do, including some things that I had thoroughly forgotten. Still, I use straight stitch and zigzag stitch for almost everything, and I intend to keep on doing so.

Finishing my Christmas shopping. I am now moving on to the last sewing, cleaning, and baking projects before Christmas. I'm being more careful this year to set aside a little time and money for myself. For example, I bought a plain white thrift store vase and a blue permanent marker, because I want to try this...sometime.

Tuesday, December 15, 2015

Christmas around the house

Joining in on The Nester's Christmas tour of imperfect homes...it doesn't have to be perfect to be beautiful (thank God, and I thank God also that the church Christmas play is O-V-E-R).

Crocheted star, recently made; I'm thinking of painting it gold:


Found objects Advent calendar, we have a little bag of real frankincense this year:


Mary and Jesus in the stable, as arranged by children: 


A slightly burnt-out strand of lights draped over a mirror:


Tree stand and skirt...I like plain burlap for the tree skirt. This kind of tree stand holds a LOT of water and is more stable than most; I highly recommend it. The tree is carrying a load of presents that the children have wrapped up for each other, so it looks too frazzled for a full picture.


Finally, a loopy crocheted Christmas ornament:


Monday, December 14, 2015

Granny's secret

Ever wonder how those little old ladies got to be so strong? One reason is that they stirred doughs like this cookie dough by hand. (The recipe makes ten dozen cookies.) Even a half batch takes muscle to stir.

Friday, December 11, 2015

Salvage

I am slowly decorating for Christmas. As usual, our big splurge is for a real live Christmas tree; for several years, we lived in an apartment where even live wreaths were banned. (We joked about setting up a small tree in our car.)

One of the many things that we trashpicked back then was a large pine dresser, with shelves like a hutch, dark finish. It became a child's dresser, and we painted it in the apartment kitchen with free paint leftovers from the hazardous waste site. The child insisted on painting the undersides of the drawers as well.

Several years and a couple of moves later, we still have the dresser. The drawer guides kept falling out, and I gave up on trying to fix them. One drawer was broken beyond repair and thrown away. Child now prefers to use the lower part of the dresser as one large bin. Which leaves me with two drawers of medium quality, that are not the right shape to keep around as storage boxes, but...they do have painted undersides in exactly the color I want for my Christmas decorating.

Step one:  remove hardware. I kept the mounts for the drawer pulls, but not the handles, and pried off the metal drawer guides with a flat bar (handy deconstruction tool, looks like a short, flat, wide crowbar).

Step two will be to disassemble the drawers themselves. I want a side piece or two for making a rack of coat hooks, and then the bottoms for some sort of Christmas sign.

Wednesday, December 9, 2015

Skeleton hand and crocheted star

Two recent projects:


The hand, done by a child with assistance from me, is based on this tutorial on YouTube; papier mache over wire, wood skewers, and rolled paper, with hot glue inside forming the knuckles and holding the structure together. It is unpainted in the picture.

The star was crocheted of dollar store string, five triangles crocheted onto a circle, then dipped into white paint, squeezed out, and dried flat. Much of the star was done while babywearing.

Monday, December 7, 2015

Tuesday, December 1, 2015

A few things

I did a little Christmas shopping at the thrift store--in our family, we give mostly new things for Christmas and birthdays, but also a few good used things. It is hard to get to many stores as a one-car family, and I rarely shop online, so I'm not looking forward to the rest of the Christmas shopping.

We had homemade bean and ham soup for lunch today...very easy to make, except for remembering to start the beans soaking the night before. Later on, a child made homemade bread.

I've been cranking out some quick sewing projects here and there:  diaper covers, underwear, leggings.

I also have a furniture project going, but slowly as it requires a lot of sawing, so it's more of an exercise project.

My husband has a 1970's soft sculpture-style wreath in primary colors that his mom made. At one point, I tried hanging it in various places indoors, but it didn't fit in anywhere. One child suggested hanging it on the front door, so that is where it is now.

I did the FlyLady sink shining (first babystep in her system). My sink definitely needed the bleach soak.

This baby has reached the point of needing Ridiculous Diapering at night:  an extra-large toddler-size cloth diaper, with a doubler (extra center pad), inside a waterproof cover, then over those a medium cloth diaper, with another waterproof cover over it, to catch what leaks out of the inner diaper (which is completely soaked by morning).

Saturday, November 28, 2015

Mobile

I had a room that needed a little something along the lines of a chandelier to hang in it. I ended up making a mobile to hang from the light fixture:


Materials:  paperboard, paper, paint, wire. Tools:  pencil, scissors, paintbrush, needlenose pliers. The ball in the middle is a sheet of paper that I crumpled, wet, and kneaded...basically a large spitball. I left the edges of the paperboard rough and didn't try hard to evenly space the circles.

The mobile's shape is based on a mobile that my grandma had at her house; hers was black and red, and smaller. The form is also vaguely (and inaccurately) atomic, which ties in with my physics background.  The mobile catches the light from the high windows well.

Monday, November 23, 2015

Some pictures

A few projects from the past, while brushing up on my photography skills for the future.


Detail of a picture frame corner, made of thin plywood, copper-coated strapping, and a copper screw:


Linen with pattern tracings for toddler pants:


The footrest under my desk:


Leg of my desk/table, leftover paint over rough wood; I like the texture a lot:


The camera focused on the suitcase in the background,,,it is Samsonite, and if the key is lost they will send you a new one for free.


Saturday, November 21, 2015

Here come the holidays

Finally, the urge to start crafting Christmas gifts and decorations and food strikes...just before the holiday season starts.

One year I made an Advent calendar by listing people and objects from the Christmas story in the book of Luke, along with some of the titles of Jesus, on index cards. I then did a sort of scavenger hunt around the house and at a salvage/surplus store, looking for a small object to represent each one.  Some of these things are heavily improvised--Fourth of July sparklers to represent frankincense--but we do have a tiny bottle with a tiny bit of real myrrh. The objects are kept in a bag made from a scrap of red and green fabric. So we have a family tradition of going through the cards and pulling out the objects, even though we frequently fall several days behind.

I am planning on sewing doll clothes from some vintage pink satin (part of a ball gown) that was given to me.

We have a fireplace that is set into a wall of brick, with no mantel. I've been thinking about what I could hang up there. Once upon a time we had an outdoor vine wreath that a bird had built a nest into, but it disappeared during the last move. Probably I should just put up something that we can put our Advent calendar objects on.

I usually make a large batch of kettle corn (caramel popcorn) to give to family. With babies around, I rarely bake cookies. Sometimes my husband does cookie baking with the kids.

My Christmas card list is very short. Once or twice, I made cards by carving a potato stamp, and stamping the design onto paper.

I've been trying to make a Christmas ornament each year for each child, that they can take with them when they grow up and move out. One year I used salt dough, which didn't hold up well in either use or storage.

Friday, November 20, 2015

Something for the first aid kit...

...Butterfly bandages, for clean, simple cuts and splits that are not too deep or too long. They can even be made yourself, from surgical tape. We have at times paid up to six hundred dollars to have a doctor put in a stitch or two, when one of these would have been enough to do the trick.

The article lays out the caveats well, so go read them there--particularly the last paragraph, which lists signs of infection to watch for--before trying this at home. 

Friday, November 13, 2015

Grace notes

Yesterday I picked a few fallen birch twigs from the yard to put in a vase.

Today I spent some time going around with a damp rag. It makes a remarkable difference in a home when the barely perceptible dust and little handprints are taken care of.

On Monday, "Rake leaves while the sun shines" turned out to be wise; the weather changed to thunderstorms in the afternoon.

I've almost gotten a handle on this baby's rhythm: he has his days and nights straight, but the one longer nap that he takes each day moves around in a precessional sort of way. Maybe he's on a 26-hour day.

Saturday, November 7, 2015

Little things

I've only got one major project (sewing, and non-urgent) going at the moment, and have been feeling a bit adrift. But there are always little things that can be done to improve a home. In my case, things like scrubbing old tape residue off doors, fishing dust elephants out from under the fridge with a stick (even with a new condenser fan, it still freezes everything...sometimes), and carefully scraping paint splotches off the woodwork.

I also moved the piano keyboard into our "school" room. It's black, and so is its stand, and they fit in better there, color-wise. Also, the radio is in there, and sometimes I like to try to play along with the broadcast music. This leaves a hole in the living room furnishings, but that spot is much brighter now without the mass of black. I am thinking of getting a chair to put there. My handmade couch is more of a daybed than a sitting couch.

Thursday, November 5, 2015

God's infinitely large sleeves, and the things He pulls out of them

I wore out my hairbrush...I've had it for I don't know how many years. I had a few dollars set aside for a new hairbrush, but I put them into the offering plate last Sunday. The next day, a brand-new, free hairbrush showed up, under highly improbable and suspiciously Providential circumstances. The other thing is that the new hairbrush has nylon bristles, which is apparently exactly the kind I need with my hair grown out long. When my hair was shorter and much more shampooed, nylon bristles put too much static electricity into my hair, so I avoided that kind of brush. But now, it is working very well for me, and much better than my old hairbrush.

Potpourri

Lately, my husband has been simmering things like pine needles, sliced ginger and apples on the stove, for the wonderful aromas...simple and inexpensive.

Friday, October 30, 2015

Take two

I've been trying to submit a claim with the health insurance company.  This is how it has been going:

Online claim submission? No.

Printable claim form on their website? No.

Claim address on their website? No.

Search box on their website? No.

Certificate of Coverage online? Yes, but only because they have to. Download enormous PDF, because for some reason PDFs from their site (and only their site) won't open in the browser.

From CoC, about 70 pages in, obtain claim address.

Mail in claim information.

Wait five weeks.

Check claim status online; only available as PDF. Claim does not appear.

Re-read CoC. That address was the notice of claim address. Claims should go to the customer service address, given early in the CoC.

Wrestle with printer that doesn't feed paper well to print claim documents again.


-------------------------------------------------


In projects, I've been working on the rest of my rummage sale clothes. A sweater and a sweatshirt now fit me, no alterations needed. The last item was an enormous wool sweater, size XL and intentionally made oversize. I was going to cut it down to my size and re-sew it, but my husband suggested shrinking it. Since it was so large, I just washed it in hot water. (There are more cautious ways of shrinking wool, involving sprinkling.) Then I dried it on Hot. It came out of those about one size smaller. So I did another hot wash and dry, and it shrunk one more size. After a third time through, it is now my size, and dense and warm...the perfect sweater to wear to shovel snow. It fits well, except rather large where the arms join the body, which I am not planning to change in the near future.

Tuesday, October 20, 2015

Found my way back

I've been doing a lot of reading.

Also, I've completed a couple of projects. One was a corduroy jacket that I found at the thrift store ($4). When I got home, I noticed there was a stain on the back. I should have checked before I bought it, but I would have bought this one anyway. Stain removal is not one of my talents, but it came out with some soaking in Oxiclean, After that, I shortened the sleeves, and now I like the jacket a lot.

I then took the corduroy jacket that I've had forever, which is baggy and shapeless and not the greatest color for me, and tried bleaching it. I was hoping the color would fade a bit, but instead it brightened as the bleach took out some of the darker tones. I am thinking of reworking it into something that fits better.

Finally, I took one of my rummage sale sweaters from last spring and shortened the sleeves. I may alter it some in the body later; for now it is only a little too big.

Saturday, October 3, 2015

Just about right

I squeezed out enough time to put a quick third and more toned-down coat of paint on the coffee table base, and it is much, much, much better. Now it looks like it belongs.

Wednesday, September 30, 2015

Toned

I've been sick, and only recently finished painting the base of the new used coffee table. For paint, I mixed some old paint samples together, guessing that the color would come out lavender. It did, but it was too bright for the mudhole colors in the living room. I experimented with wiping some black acrylic over it, but it was too difficult to apply evenly. So I mixed a little of the black paint in with the lavender for a second coat. and that came out much better, although still slightly too bright. It relates to the colors in the rug and the quilt now. I have about enough paint left for an even more toned-down third coat, when I get to it.

I also made progress on the skirt that I am handsewing; I finished the side seams. I am using crochet thread in a backstitch, which goes more quickly than one might expect.

Next month's big project will be raking leaves. I have been getting an early start because I'll be doing most of it, while carrying a baby. I can rake one-handed for short periods, and then lift the leaves into the bin with my trusty scoop shovel (grain scoop). I'm glad I started lifting weights a little again.

Wednesday, September 16, 2015

Seed money

I made it to the thrift store, knowing that I don't really need anything at the moment except for more books. I spend a lot of time reading in the newborn weeks, and am well on the way to having read ten thousand pages this time around.

I found three paperbacks: one spiritual, one practical, and one classic literature. With a 40 percent off sale, it was 93 cents for the three, and the practical book is likely to save me many, many times that amount.

With cash flow being tight recently, I decided not to renew our only magazine subscription (Backwoods Home). But there, too, over the course of a year's subscription I am likely to find information and ideas that are worth far more than the subscription price to me. (If only learning about things enough to know that I don't want to try them.) So I am reconsidering it.

The spiritual book was also worth far more than its price--it has gotten me thinking about goals and dreams and vocation again. At one time, we had a fairly definite plan that we were working through, but circumstances changed and God led us in a different direction.  

Wednesday, September 9, 2015

A few things

I fixed a honeycomb shade that wouldn't raise. The hardest part was in figuring out how to take it down off its bracket, but I eventually found the installation instructions, which told me the magic secret direction to pull. After that, I just had to get a string wound back onto its spool, instead of around the shaft. As a bonus, I also learned how to clean them.

I fixed the toilet chain (inside the tank). The broken chain links were there, but there was not a lot of space to work, and I have large hands, so I used a paper clip.

The fridge has not been working well lately. We have identified several reasons:  1. Children not closing the freezer door all the way (it pulls forward like a drawer). 2. The gasket for the freezer door was falling off, on the bottom edge where it is hard to see. 3. Insufficient air flow. from dust in the coils and the air outlet, and because the fridge is crammed into an enclosed space without the recommended clearances. One night I finally managed to wrestle it forward enough to vacuum the air outlet on the back, and I didn't push it all the way back, but left it sticking out a few inches to help it shed heat. I vacuumed the coils again, but there is a lot of caked-on dust far back in that the vacuum can't budge. The fridge is still freezing some things in the refrigerator compartment. I am bracing myself for a high electric bill.

For another late-night project, we caulked the bathtub.

I've been slowly working on sewing a skirt, from rummage sale fabric. I have the pieces cut out and edge stitched, and I am sewing the seams now by hand, with crochet cotton, doubled. It is easy to pick up and put down, as I have the time.

At the state fair, I bought a leather barrette: a strip of leather with two holes in it, and a stick that passes through the holes. Not hard to make one yourself, but it had a nice design, and I am not that good at tooling leather yet. I did modify the stick by cutting it shorter and whittling a blunter point on it, so I don't poke the baby when I turn my head.

Thursday, August 27, 2015

Evaluation and adjustment

The wool (cashmere!) diaper covers are working well, even at night-time. Most of them have shrunk further with washing, but they all still fit.

Previously. I kept my sewing machine in the dining room, so I could sew at the table while keeping an eye on everything. Now, about the only times I can sew are when I happen to wake up especially early, or during my designated Introvert Time, so it makes more sense to put the machine in my room in the basement, which is far from the bedrooms. I can leave everything set up in there so it is ready to go. I have some low-priority sewing projects that I am kicking myself for not chugging through before the baby was born.

The neighbors gave us a coffee table left over from their yard sale. I did a (relatively) quick refinishing of the top with Danish oil left over from the armchair project...it's not perfect, but it's much better. I am thinking of painting the lower part with some old paint samples, mixed together, which would reduce the visual weight of the wood finish, and harmonize its reddish color with the rest of the living room.

Thursday, August 13, 2015

A little elbow grease

I had a few free minutes in which to tackle the gorilla handprints on the dropped ceiling panels in my little room in the basement. (You'd think even a gorilla would notice that he is leaving prints, after one or two, or eight, panels, and go wash his hands at the sink ten steps away. No, he had to leave his mark on all of them.) The panels look like they have been painted before, so painting them again could be an option, but the worst of the grime came off with a little scrubbing with warm water, and the rest is hard to see in the glare of the fluorescent light.

Saturday, August 8, 2015

How to get things done with a baby

Really, it boils down to two steps:

1.  Admit that it's practically impossible to get anything done while caring for a young baby.

2.  Then go on and do what you can, when you can, anyway.

Small, focused efforts will add up, over time. My current project is catching up on weeding around the yard, after several weeks of no one doing anything. I've hoed and pulled weeds with my toes while babywearing, and have hand weeded during a couple of nap times. Not much time, but the yard is starting to look a lot better.

Wednesday, August 5, 2015

More diaper covers for the HE washer

My mother-in-law saw some of the diaper covers that I made from scrap cashmere, and got excited about making more, from her stash of secondhand cashmere. She borrowed back her sewing machine that she had given me, and went crazy for a couple of days, emerging with a stack of very nice covers (which are also called soakers). She sewed in the tops of old wool socks for most of the leg openings, added ties so that the elasticized waists can be reduced or enlarged, lined some of them with additional cashmere, and used scrap cashmere to do cute little appliques.

Thursday, July 30, 2015

Baby time

I've once again managed to birth an embarrassingly large baby, an embarrassingly long time after the so-called "due date", after an embarrassingly easy (relatively easy, that is) labor.

Saturday, July 11, 2015

The last room in the house

I got tired of sitting around in various degrees of pre-labor, and made an unsuccessful search among my husband's boxes of stuff for the one box of yarn, planning to knit a dishcloth. Blocked in that direction, I started thinking about what I could do with "my" room:  a windowless mostly-finished room in the basement with a very low dropped ceiling and a gas meter; the least attractive room in the house. I have a few of my few things in there, but spend very little time in it. Most of my craft supplies and tools have migrated upstairs, so I can work while watching children. But with the hotter weather, the basement has become more attractive.

I started with a couple of "How can I make this prettier and work better?" tweaks; getting the yards of phone cord and coaxial cable that came with the tiny closet off the floor, so I could put my homemade concrete weights in there; putting the handful of books in the crate that I have for a small bookshelf; bringing down a few more craft books. Our old rocker was a Problem upstairs, so it is in there now. This led to thinking about having a desk or a table to sit at, and to realizing that there was no reason not to make one....

I started by sitting in the rocker, at various tilts, with a tape measure to see exactly how high I wanted the table to be...the advantage of being able to customize something perfectly to your own needs is not one to be given up lightly.

After some scrounging in the garage and basement, I found a piece of scrap plywood from one of my husband's projects for a table top, and lengths of wood from the lumber motherlode for table legs. I simply joined them with screws, which is a rather wobbly way to do it, but it will be easy to disassemble for the next move. I can add more structure later, if I want. The table is not for heavy crafting; there is a workbench in the utility room next door for that. I sanded the top, and then rubbed in some paraffin wax from an old candle for a subtle finish (violin fingerboards are finished with paraffin in this way); I need to repeat this as I missed some spots. Then I painted the legs (which are rough, weathered cedar) with the same free latex paint from the hazardous waste center that I used on the dresser that is in there.

So the space is quickly being transformed. I have a short list of other things to find or make, for it to be fully functional. Then I want to do something about the panels in the dropped ceiling, which for some reason are covered in grimy handprints.

A simple start in the kitchen: recipes

I learned to cook and bake from helping my grandma in the kitchen, from experimenting at home on Friday Serve-Yourself nights (when my mother refused to cook), from working in church and camp kitchens, and from cookbooks. Now my children are learning how to get around in the kitchen.

Here are some of my core frugal recipes. Abbreviations:  C for cup, T for tablespoon, tsp for teaspoon.  I buy yeast in bulk at the co-op (for around $6 per pound), so I generally skip the "proofing" step in making yeast breads, as I know that it is alive and will activate. "Cocoa powder" means baking cocoa, not hot cocoa mix. In place of baking powder I often use 1 part baking soda to 2 parts cream of tartar, when I can buy the cream of tartar in bulk.

On my own recipe cards, I write the baking temperature and pan size at the top, because preheating the oven and getting the pan ready is what I actually do first in baking.

These are mostly baking recipes, because baking requires more precise and definite recipes, while stovetop cooking is usually much more flexible in terms of ingredients and techniques. I'd advise getting a good basic cookbook (such as an older edition of 
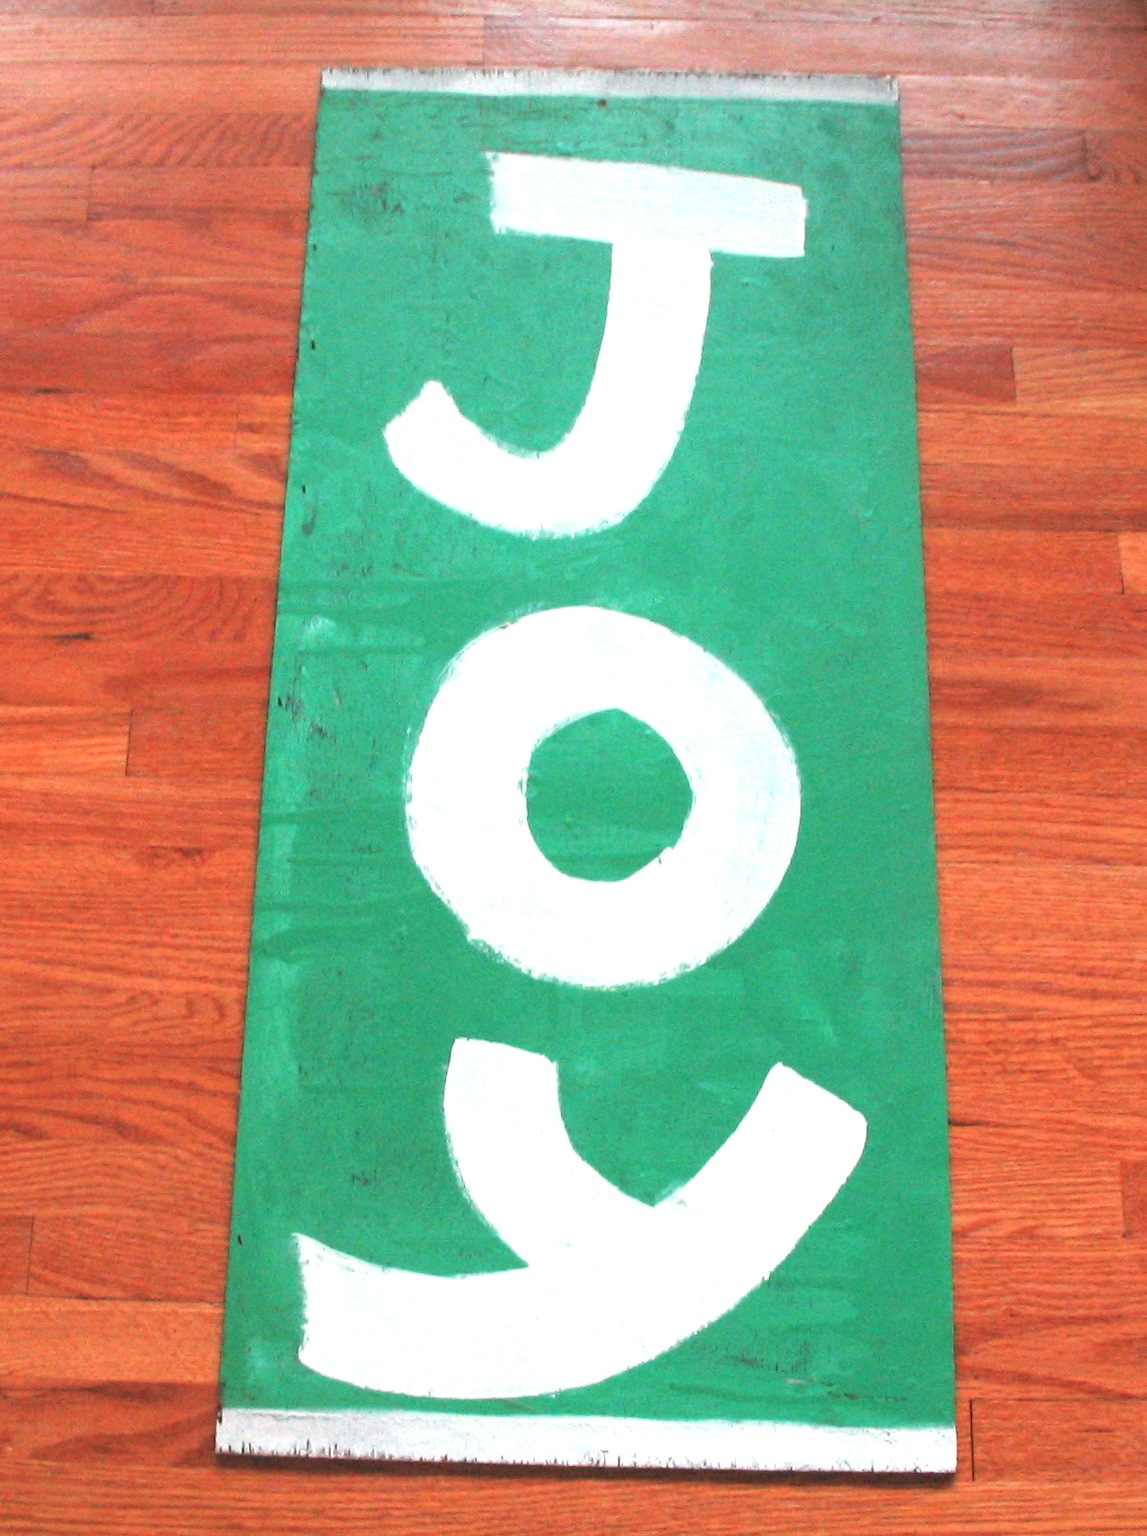
The Joy of Cooking) that teaches the techniques of cooking and baking, in particular:  how to select and cook meats and vegetables, make a white sauce, make a basic soup and stew, how to knead, when to take your baking out of the oven. Some sort of primer on slow cooker/CrockPot cooking would also be good. Dried rice and beans and pasta and oatmeal have cooking instructions on their packaging; it is well worth learning how to cook these "from scratch", rather than buying the convenience versions. I keep some old issues of Taste of Home and Taste of Home's Quick Cooking magazines, to browse through when I get in a cooking rut, although they contain many recipes that could hardly be called frugal.


No-knead peasant bread

2 1/4 tsp (or 1 packet) yeast
2 C warm water
pinch sugar
4 scant C flour
2 tsp salt

Mix ingredients in bowl; cover and let rise in warm place 1 hour. Divide dough into two greased pans and let rise again for 30 minutes. Preheat oven to 425 degrees, put pans in and turn oven down to 375 degrees; bake for 35 minutes.


Pizza/breadstick dough

2 1/4 tsp (or 1 packet) yeast
1 C warm water
pinch sugar
2 T olive oil
about 3 C of flour; increase slightly for breadsticks
1/2 tsp salt

Mix ingredients and knead a few minutes to make dough smoother and more elastic. Put dough in bowl, oil it with a little more olive oil, cover, and let rise in warm place one hour. Punch down. Let it rise again (I usually don't).  Press into cookie sheet/pizza pan for pizza, or flatten, slice, and twist to form breadsticks. Pizza dough can be prebaked for 5 minutes before topping (I usually don't). Pizza:  add sauce and toppings. Bake at 375 degrees for 15-18 minutes for pizza, 12-15 minutes for breadsticks. Breadsticks: rub tops with butter. (This recipe originally called for a shorter baking time at a higher temperature, but I can't remember exactly what they were, and this is what I do.)


Fast pizza dough

2 1/4 tsp (or 1 packet) yeast
1 C warm water
2 C flour

Mix and press onto pan; top and bake at 375 degrees for 15 minutes.


Simple chocolate pudding

2 C milk
1/4 C sugar
2 T cornstarch
2 T cocoa powder
1 t vanilla

Combine everything except vanilla in saucepan; stir and cook over medium heat until it thickens and boils. Remove from heat and stir in vanilla.


Cheese sauce

(This is a variant of the chocolate pudding recipe.)

1 C milk
1 T cornstarch
2 T butter
1/4 t salt
dash pepper
about 1 C of shredded cheese, or a handful of diced cheese

Stir and cook everything but cheese in saucepan over medium until it thickens; remove from heat and stir in cheese until melted. Put back over low heat and stir if needed to melt cheese.


Tightwad Gazette's Generic Muffins (rewritten to put ingredients in order of addition)

2 to 2 1/2 C grains
Up to 1/2 C sweetener
2 tsp baking powder
1/2 tsp salt

1 C milk
Up to 1/4 C fat
1 egg
Up to 1 1/2 C additions

Mix dry ingredients in bowl; add wet ingredients and mix briefly, put into muffin pan (greased or lined with cupcake papers) and bake at 400 degrees for 20 minutes


Wacky Cake

1 1/2 C flour
3/4 C sugar
1 tsp baking soda
1 tsp salt
3 T cocoa powder

1 tsp vanilla
5 T vegetable oil
1 T vinegar
1 C sour milk

Grease an 8x8 inch pan, put in dry ingredients and mix. Add wet ingredients and stir thoroughly. Bake 30 minutes at 350 degrees.


Cream cheese frosting

8 oz. cream cheese
1/2 C (1 stick) butter
1/2  tsp vanilla
1/2 tsp lemon juice (optional)
powdered sugar

Soften cream cheese and butter; beat until combined. Mix in vanilla and lemon juice. Gradually mix in powdered sugar until it is the desired sweetness and consistency.


Popcorn on the stove

I use a stockpot for this, with its accessory steamer basket inverted over the top to act as a lid that lets steam out while keeping the popcorn in.

2 T vegetable oil
1/2 to 3/4 C popcorn kernels

Put oil in large pot with 3 kernels; cover and heat over medium heat until kernels pop. Add remaining popcorn, cover, swirl pan to coat kernels in oil, and continue cooking over medium heat until popping sounds slow down, occasionally shaking pan from side to side.


Homemade cocoa

2 C milk
1-2 T sugar
1 t cocoa powder
2-4 drops of vanilla

Stir in saucepan and heat over medium heat until steaming.


Potato wedges

6-9 potatoes
1 T mayonnaise, olive oil, sour cream, or plain yogurt
1 t salt or seasoned salt
seasonings as desired

Slice potatoes into wedges about 1/4 inch thick and put into large bowl. Add other ingredients and stir until wedges are coated. Spread in single layer on cookie sheets and bake at 375 degrees for about one hour.


Quick bar cookies

1/2 C butter (1 stick), melted
1 1/2 C brown sugar (or use white sugar and add 1/2 tsp to 1 tsp molasses, or just use white sugar)
2 eggs, beaten
1 tsp vanilla

1 1/2 C flour
1/2 C dry oatmeal (optional)
1/2 tsp baking powder
1/2 tsp salt
1 C chocolate chips (optional)

Mix first four ingredients in bowl. Add dry ingredients and mix. Put in greased 9x13 pan and bake 20 minutes.

Thursday, July 9, 2015

The quest for status and approval

VALS is a market segmentation scheme for businesses to classify U.S. consumers into eight types and target them in their marketing. It is two-dimensional:  primary motivation (ideals, achievement, self-expression) versus resources with which to innovate (low to high).

The interesting thing for me is how the different VALS types of consumers seek to increase their social status via status symbols:  Experiencers travel to more exotic places; Makers make more things for themselves; Strivers get more elaborate tattoos. People (once they get beyond mere survival) tend to play one status game or another, depending on their means and their values, and businesses try to position themselves to profit from it.

I recently started reading Charlotte Mason's Ourselves, which mentions approbation as a basic and legitimate human need. I have come to believe that humans are hard-wired to self-destruct (in one way or another) without it. But you don't have to buy it; Jesus offers it for free, along with genuine rest from the toil of constantly proving one's worth.

Wednesday, July 8, 2015

The physics of the flu shot

(Yes, putting aside most of my crafts projects has left me with a lot of time to read and think and exposit.)

Somewhere I once read a statement by a doctor (I wish I had the reference, but I don't) saying that vaccination could only ever be an effective strategy against a limited number of slowly-mutating micro-organisms.  Limited, because there is a physical limit to how many vaccinations a human body can receive and produce immunity from. Slowly-mutating, because the antibodies that are created to identify and destroy a particular threat won't be effective if it has changed so much that they can't recognize it.

Influenza is not slowly-mutating, and has a variety of strains. So, for the flu shot, each year "they" try to guess what the most prevalent strains will be (say, strains A, B, and C), and the manufacturers produce a vaccine that targets these strains. A fairly high percentage of the population dutifully get their flu shots, and for most of them it is effective: they don't fall ill with strain A, strain B, or strain C, and so those strains don't spread through the population. Instead, the flu strains that go around are strains D, E, and F. Health officials issue a statement:  "Oops, we guessed wrong. We promise to do better next year, so be sure to get your flu shots then!" Rinse, and repeat the whole sequence the following year.

So, the strains that are in your flu shot are never the strains that are actually in circulation around you that year. Probably widespread flu shots do help somewhat to reduce the total number of flu cases, by blocking the spread of the frontrunner strains each flu season. But they can't be counted on to protect any particular person from getting the flu, and it is bad science to claim that they can. (Public health policy operates on the assumption that People Are Idiots, and shamelessly uses bad science and propaganda to promote its various initiatives. But actually, only Most People Are Idiots.)


Tuesday, July 7, 2015

Local sources, and a very broad trend

The Dollar Tree store near our old house in the undesirable urban school district, where only 60% of the elementary-age kids attend public school, usually has a decent selection of educational workbooks for the lower grades. The one near our current house, in a suburb with a lingering reputation for good schools (despite changing demographics as the low-end housing is increasingly occupied by immigrants*), where homeschooling has barely been heard of and is only done by weirdoes, does not. But I found a few.

I have been avoiding Goodwill for the past several years, as my thrift store browsing time is very limited, and Goodwill is relatively expensive compared to other thrift stores in the area. But I found that they are now selling VHS tapes ten for $2, and also regularly run 50% off coupons in the local coupon supplement.

-------------------------------------------------------

*There are over forty million first-generation immigrants in the U.S. now. That is more than ten percent of the population!  It first struck me when I saw two versions of the U.S. demographic pyramid, twenty or thirty years apart; the "baby bust" of Generation X that followed the Baby Boom was visibly filled in over time. I imagine that about forty years ago, some high-level leaders looked at the demographics of the baby bust, and the continuing effects of widespread access to contraception and abortion, said "Oh ****, Social Security is *******!!!", and created a tacit bipartisan initiative to encourage immigration by whatever means necessary.

Thus immigration has become the unmentionable elephant in the room for nearly every social issue:  education, health, housing, employment, income, poverty, voting, religion. Comparisons of past and present measurements in those areas need to be accompanied with many grains of salt, because the population itself has significantly changed. Reading the newspaper becomes an exercise in spotting what is not being said.

Monday, July 6, 2015

The value of good information

While wandering around the internet, I stumbled upon a brief list of foods that can be migraine triggers. My husband knew most of his food-related triggers, but this list had several that we had not heard about before. This new information will likely spare him several headaches a month.

I've been slowly reading through Will Durant's The Story of Civilization series. It is helping me put the history that I've largely learned piecewise into a much more coherent whole. It has also made me much more wary of historical examples used in rhetoric...it is very easy to cherry-pick a bit of history to make your point, while ignoring whole heaps of counterexamples, not to mention the broader trends and forces that have played out over time.

I've also been stretching my learning through crossword puzzles; hard ones that force me to resort to the atlas frequently. This has exposed a number of gaps and inaccuracies in my geographic knowledge; Somalia is not directly to the west of Egypt.

For my own amusement, I calculated the percentage of our gross income that goes to health insurance premiums. At present it is large but sustainable; history has shown that the peasantry will generally tolerate incredible impositions before resorting to revolt. But next winter, we may be left with a choice between health insurance and heat, and I know which way we will vote with our dollars. It has been obvious to me (though somehow not to the Supreme Court) that Obamacare was never designed to work in the long term, but to function as a stepping-stone to single-payer health insurance. Therefore I have been waiting patiently for it to fail, and I fully expect that it will be replaced with something even worse.

The liberal strategy of "let's bring the gays out of the closet, and then we'll shove the conservative Christians in" has also been apparent to me for a long time, so the Supreme Court's same-sex marriage decision was no surprise.

Not being able to do much about those issues, I have been doing what I can at home to make the world a better place: weeding, hanging up a few more decorations on the walls, restocking the pantry. And also looking forward to the world to come...what can I do now that will stand the test of fire??


Wednesday, July 1, 2015

Does it provide support?

I've been thinking lately about how the things that are stored in the "support spaces" of the home (basement, garage, attic, closets, cupboards, utility room) should support the life that is being lived in (and out of) the home's living spaces. We are still storing many things that we never use, or look at, or, in some cases, even remember that we own.

Tuesday, June 30, 2015

Painted lampshade

My husband brought home a free lampshade, covered in fake silk of a dark, swampy green color. I decided that it would work best with my bedroom floor lamp, but not in that color, because the lamp is in shades of emerald green. I experimented with bleaching the lampshade, but the bleach had no effect on the synthetic fabric. So I went back to my original idea of painting it, using free white paint from the county hazardous waste site. I did two coats, with the brush strokes in one direction on the first coat, and in the perpendicular direction on the second, which adds a subtle texture between the raised designs on the fabric. It is nearly dry now, and looks like it will fit in well.

Saturday, June 27, 2015

Loose ends

With the end of this pregnancy rapidly approaching, I've been finishing up a number of projects and downshifting into maintenance mode (which in itself takes up most of my energy). The last coat of linseed oil on the coffee table top is still drying, one week later. I gave the armchair its two coats of Danish oil--this gave it a light, pleasant finish. I've been trying to get the yard under control, which has been difficult because of the frequent rains. As I was doing the usual bread baking, I baked a few extra loaves for the freezer. Usually we try to have a couple of batches of boeuf bourguignon canned or frozen ahead of time, but with money very tight this time, we'll have to put it off until after the birth.

I've also been trying to do some deep cleaning and organizing, considering that it will probably be about six months (i.e., when baby achieves some measure of mobility) before I can take on any substantial projects in those areas. I've never had a nursery to decorate; cleaning and organizing have always been my nesting projects.

My husband found a free glider rocker and footstool at the curb. This just after we finally got our old rocker back from relatives who stored it for us when we moved. The fabric goes well with the family room, and it needed only a little cleaning up. The arms on it are very low, so probably it won't work well for nursing without pillows.

Since I usually go about a week past the due date, I schedule a potential outing or two for that time.

Monday, June 22, 2015

Crocheted garland with homemade hook

I recently made a trip to the dollar store, and came home with a ball of cotton twine to play with. The first thing I tried was knitting i-cord with it, which worked fine, but I wanted something with more texture to hang on the wall. So I turned to crochet, and to the simplest crochet stitch:  chain stitch. Then I started joining the chain at intervals to make loops:


The pattern is (after a few chain stitches to start off):  chain 7, do a single crochet stitch into the first of the chain 7 to form a loop, repeat. End with a few more chain stitches, if you want. The chain 7 makes a nice rhythm to the work. Not all of the loops hang down nicely; some like to flip, and some I had to make flip to even things out. When it was finished, I hung it across a wall in our TV room.

The hook in the picture is made from a hardwood dowel, whittled to shape. It is currently the only crochet hook that I have, and is a bit on the large side. It was not hard to make; I have even made hooks from fallen sticks before. I recommend shaping the top of the "head" first, and cutting the "throat" last. I didn't put a finish on it; homemade hooks (and knitting needles) will gradually take on a pleasant polish as they are used.

Thursday, June 11, 2015

Fun with hot glue

I have a hot glue gun, but I rarely use it. Today, however, called for spending some time playing rather than working.

I had some card stock samples in various colors, and chose matte gold. The simplest thing to do with random paper and hot glue is to cut out leaf shapes and glue them together, so I did. I wanted something to hang on the inside of the front door; something more angular than the wreath that was there, because of the shape of the door's window. So I cut a while and glued a while, and came up with something that I could hang on the door. It works well there; the metallic card stock shines without glare, and brings some light into that relatively dark corner.

Then I took the wreath that had been on the door, and hung it in the dining room, where it contributes to the color theme of red, deep teal, and white that is developing in that room. (This wreath was from the recent rummage sale, and I have been moving it around, looking for the right place for it.)

I also braided some scraps of paper to hang on the outside of the front door, but only temporarily as I plan to hang baby booties there when the time comes!

Monday, June 8, 2015

Increments of progress

Recently I:

Put up the clothesline. (This is a metal clothesline that I found on clearance at Walmart for $1 years ago, and bought, even though we were living in an apartment at the time.) Last winter, when we were without a dryer for some time, I figured that we saved about 75 cents per load by hanging laundry to dry.

Pulled out the receipt for our dehumidifier, which had gone from not working well to not working at all, and discovered that we had two days left to return it. I am going to mark these deadlines on the calendar, for future major purchases.

Started mending a child's favorite cotton sweater, which was unraveling in many places. This involves more or less re-knitting the dropped stitches with a pair of yarn needles, but I'm enjoying making skilled repairs--a little at a time.

Finished buying the most essential birth supplies and washing the sheets and towels that will be needed.

Looked up how to submit a claim to our health insurance company, as this midwife does not have a billing service. This company won't even put a blank claim form on their web page.

Put several coats of linseed oil on the top of the coffee table. Linseed oil is nice, but it's slow; each coat takes at least two or three days to dry (oxidize, actually). Three more coats to go. The oily rags are hung on the clothesline until trash day, to avoid spontaneous combustion.

Used a $5 off coupon to buy the Danish oil that I need to (finally) finish the armchair to match the couch. Danish oil is very fast, you can put on several coats in a single day, but that means you have to be extremely careful with the oily rags; read the directions.

Looked up the manual to the refrigerator online, and discovered that over-cooling may mean that the coils need to be vacuumed. Discovered that they certainly did need it; they looked like they had never been vacuumed. So far this has only helped the fridge to freeze our food more efficiently; there is an exhaust vent on the back that also should be cleaned. The fridge was installed into a niche with less than the recommended clearances, so it is very difficult to pull out, and it may be that we are stuck with overchilled food because of insufficient air flow around it.

Noticed that egg prices suddenly increased a lot here...to $2.99 per dozen for large eggs, and the store no longer carries flats of 30 eggs; a carton of 18 eggs now costs what a flat of 30 cost before. Instead, they filled the shelf space with several varieties of organic eggs that cost even more for only a dozen. Still, a dozen large generic eggs is 24 ounces (1.5 pounds) of very economical high-protein food.

Found a wood alto recorder at the thrift store, for $2, which must have been from God because I only saw it as I was making a quick second pass over the toys, before the store closed. (Soprano recorders are fairly common; altos are much rarer and more expensive.)

Monday, June 1, 2015

How to make a blank hardcover book, part 2

(Part 1 here.)


Here are the first, second, and third handmade blank books that I have made.

Continuing from Part 1:

Step 8:  Trim the text block. I skip this step, as you can see from the picture. As I recall, the best way to do this is to clamp the block firmly between two pieces of wood in a vise, and trim the edges with a very sharp chisel.

Step 9:  Cut the cover boards. (I make these from the heavy paperboard inside old three-ring binders.)  The cover boards should be somewhat longer and wider than the text block; if anything, I made them a bit too large on the most recent book. You may also, depending on your book, want to cut a piece for the back of the spine; I didn't.  A utility knife works well for cutting these, although it may take more than one pass. One source recommended slightly rounding the edges of the boards after cutting; I did this by burnishing (rubbing with some pressure) with a tool handle.

Interlude:  Making flour paste

Homemade flour paste is simple, cheap, and stronger than you might expect. The covers that I have glued on with it have stayed on, through months of daily use and abuse. PVA glue will also work for any of the gluing and pasting steps that follow.

Flour paste recipe:  1.5 cups cold water, 4 Tablespoons white flour. Whisk the flour into the water in a saucepan, and then stir constantly over medium heat until it boils. Let cool. This recipe makes far more paste than you need for a single book. Leftovers may be refrigerated and used later, until they start to get moldy.

Step 10:  There are different ways of dealing with the spine of the book at this point. The method that I learned is to make a flat tube of lining paper as wide and as long as the spine, and glue it to the spine.

Step 11:  Set cords into cover boards, and glue. (If you are using tapes, I believe they are simply glued to the outsides of the cover boards.) Make a hole in each cover board, about 1/2 inch in from the inside edge, for each cord to go through. (The cords will go from the spine to the outside of the cover boards, then in through the holes, where their ends will be glued down.) I used an awl to make the holes, a sharp nail would also work, or drilling. To keep from the cords from making bumps that show through the covering material, use a sharp knife to cut a shallow channel for each cord to run through to its hole. Then, one board at a time, bring the cords through the holes, trim so that there are two or three inches of cord to the inside of the cover board, and glue/paste the cords in place (on both sides). Since my cords are braided, I unbraid each end to the hole, and spread out the strands as I glue them down. Make sure the cords aren't pulled so tight that you can't open the book. Let dry.

Step 12:  Glue the outer covering onto the boards and spine. The outer covering is usually a single piece of material; leave extra to wrap around the edges of the boards, and to fold down in at the top and bottom of the spine. I find it easiest to cut the material on the large side, and trim it later. For the first two books I used suede and leather; this time I used denim.

Step 13:  Fold over the edges of the covering material, trim, and glue/paste down. I aim for 1/4 inch of material glued to the inside of the cover board, for each edge. I learned a handy trick for mitering the corners:  before you glue the edges, make a 45 degree cut at the corner, but instead of cutting this exactly at the corner, cut it two cover board thicknesses away from the corner. Or, you can bring the edges around, overlapping them at the corner, and cut through both layers at once with a sharp knife to make the miter.

Step 14:  Tip in end papers. End papers are folded sheets of paper pasted in before and after the text block; to "tip in" means to put paste or glue along the folded edge, and then press it into place. One source suggested doing this much earlier in the process, before trimming the text block; I tried that this time and wasn't happy with the result. Trim the end papers.

Step 15:  Line the inside covers. (If your cover material is thick, you may need to fit and glue something in beneath the lining first, to make the inside cover level.) It may be helpful to use scrap paper to keep paste/glue from going where it shouldn't.

Step 16:  Cover finishing. Fold the edges in at the top and the bottom of the spine, and perhaps glue them down, if you didn't already. With the most recent book, I cut the material too short here, and ended up sewing on extensions by hand. Decorate the cover as desired. In one version (middle book in the photo), I made a little loop of leather to hold a pen. But then I found that I prefer to use the pen to mark my spot, so that it is ready to use at all times. This time, with a denim cover instead of leather, I experimented with making corner protectors from sheet copper. I made a paper prototype/template first, cut and fitted the copper (which is from the art store and is thin enough to cut with scissors that I don't care too much about), and then secured each with a small copper rivet, through a hole drilled through the corner protector and the cover.

Somewhere in these later steps, the fancy stitching at the top and bottom of the inner spine that you see in real hardcover books can be done. I tried it with the first book, and failed to master it, and since then haven't bothered. Apparently this stitching is often faked, in commercial books.

Friday, May 29, 2015

Simple pot scrubber crochet pattern

I make my own pot scrubbers for free from plastic mesh bags used to hold produce like oranges or onions. There are lots of ways to do this; you could just roll the bag up into a doughnut shape and tie it, but here is how I crochet them. If you don't have a mesh bag, tulle fabric also works well.

Cut the bag in a spiral into a strip about 1.5 inches wide, avoiding labels and large holes. If you have more than one strip, they can be joined with a slit joint.

Chain 6, join to make ring. [This leaves a hole in the center; I am thinking of doing ch 4 here next time.]

Chain 4, then make triple crochet stitches into the ring until you are about to run out of bag, or until the scrubber is a full enough circle to suit you. Join the last stitch to the top of the ch 4, tie off, work in the end. That's it!


Tuesday, May 26, 2015

Throw pillow cover

One of the feather throw pillows from the rummage sale had a very 1980's cover, from which I salvaged the zipper. I found that I had more than enough scrap corduroy from the sale to make a new cover. Corduroy is not ideal for a pillow that is going to spend a lot of time on the floor, but I also found a clothes brush at the sale.

I wanted a removable cover with cording. Sewing cording into a seam is really not as hard as it looks. For the cord I had a scrap of clothesline rope. I put a cording or zipper foot (which allows you to stitch right next to something bulky) on the sewing machine, folded a strip of fabric around the rope, and sewed it closed. When I needed another strip I did a bias join (there's a diagram here if you scroll down a bit). Then I trimmed the edges to the same seam allowance that I was using for the pillow.

I cut the front and back fabric for the cover. In the back piece I inserted and sewed in the zipper, and then recut the piece to the right length. It has been a while since I've sewed in a zipper, and I probably should have looked up the procedure, but it turned out all right.

Assembly:  I put the front and back pieces with right sides together, with the cording between so that all the seam allowances were even (so the cord lies to the inside of this sandwich). Then, with the cording foot, I stitched around just outside the cord. (This mostly came out well, although in a few places I didn't get quite close enough to the cord, and the cording stitching shows a little. I suppose I could restitch in those places if I cared to.) At the corners, I eased the cording around in a curve, and sewed along the curve. The cording came out about an inch too short, although I had tried to allow several extra inches, but I added a small scrap of fabric to cover the gap and left it at that. There is a more professionally-sewn tutorial here, if you are interested.

The next step is to wash the pillow:  Hand wash in mild detergent (or dishwashing liquid), spin in the washer, dry on low in the dryer with tennis balls and a towel to help fluff it and get the water out, but don't overdry.

Friday, May 22, 2015

Bringing the couch into harmony

There was much more fabric in the cotton curtains than I had expected, but it wasn't right for the couch:  the cool blue went all right with the rug, but against the wall color it made the couch look like a jewel sitting in a shallow mud puddle. Also, the fabric is far too delicate for what our couch goes through.

Second try:  I thought about what we have, and decided to try an old blue, gray, and off-white quilt. This is a commercially-made quilt with some hand topstitching that we have had for years and years. This quilt worked better than expected on the couch; the blue and the off-white go with the rug colors, while the shadows that the quilted texture creates in the off-white fabric come close to the muddy deep beige of the walls. I feel like I am starting to get somewhere with this room.

Wednesday, May 20, 2015

Serendipitous sale

I found much more at the rummage sale than I expected to. Praying beforehand may have had something to do with that. This sale runs for three days of normal, priced selling, and then ends with one day of bag and cart sales:  $8 for a grocery bag and $35 for as much as you can fit into a shopping cart.

In the past, I have usually bought one bag full. This year, considering the length of my shopping list (yes, I make an actual list of things I am looking for), I elected to go with the cart. I timed my arrival to miss the initial cart stampede. When I was there, the sale wasn't crowded, and by the time I left, there were only a handful of shoppers.

And I found a rug!!! A 9x12 foot flat wool rug, rolled up, looking neither too clean nor too worn. I also found a smaller rug. They both have large flowers on a cream background with a border; the color scheme is 1980's Country style. When I got the rugs home, I unrolled the larger one, prepared to have to wash it on a tarp in the driveway and maybe also to tea dye the entire thing...but after a good vacuuming there were only some minor stains and spots on the top side, and worn places along two edges, while the back side was almost pristine. The large rug went into the family room, and the smaller one into the TV nook. As Alexandra Stoddard says about decorating, if you change one thing, you have to reconsider everything else. The rug is making me think about making a quieter cover for the couch cushion, in a cooler color. The set of three all-cotton curtains that I found may work for that, if I sew them together.

I also found various remnants of knit fabrics, suitable for sewing pants for boy play clothes. Today I cut out and started sewing six pairs of pants from this fabric. I found several polyester (ugh) pajama pants, from which I could steal the elastic, but one of my children claimed them first. I altered them to make the legs narrower by turning them inside out and sewing new side seams with a zigzag stitch.

I felt my way through the throw pillows (apparently no one ever leaves the tags on) and found some that were down/feathers, because I discovered after we moved that although I hate beige carpet, I do enjoy lying on it with a feather pillow. I need to wash them, and make a new cover for one.

I found various clothes for me, most of which I will be altering, postpartum when I return to a less pyramidal shape.

Craft supplies:  crochet cotton for embroidery, craft wire, a cheap three-ring binder to supply cover boards for my handmade blank book, a roll of wallpaper for making sewing patterns, corduroy scraps, a half-used sketchbook, and assorted envelopes and small notebooks and yarn for the children. I couldn't find leather anything for my book cover, but I did find a pair of jeans in an interesting green.

Household items:  a towel, a washcloth which is now a cloth baby wipe, boot waterproofing, a like-new memory foam mattress topper for a double bed, a barely-used sleeping bag just like the one I used to have twenty years ago, a Rada paring knife, several small plates, fireplace tools.

I found a number of books for me and the children, so I am set for reading material for a while. I questioned whether I should get Home Comforts:  The Art and Science of Keeping House, which I used to own (before the Big Purge) and which I generally find exhausting to read because of the implied high expectations for housekeeping, but I did get it and it is proving useful...now I know how to wash my feather pillows, when I get to them. 

Even near the end of the sale, on my second pass through, I was finding good-quality items. One was a Baufix starter set of wooden construction pieces (bolts, nuts, bars, wheels) with an original price tag of almost $100 that was hiding among the jigsaw puzzles. Another was a kerosene lamp in a box under a table. (Much earlier a lady had picked one up that I was on my way over to get.) There were still down throw pillows there when I left. 

Finally, I got a big foam gymnastics wedge, which went on the very top of the pile in the cart. It has been very popular with my very active children.

I didn't find everything on my list, but I am amazed and grateful at how much of it I did find, along with the things that I wasn't even looking for.

Friday, May 15, 2015

More small changes

I rewired the lamp for the school room with no great difficulty and painted it; the final step is getting the right size bulb. I did a thin wash of beige paint over the color so it would harmonize with the wall color (accept and transcend), but the lamp still stands out a bit too much.

Taking advice from Lady Lydia, I did some no-spend decorating: organizing and arranging things nicely in the bathroom.

My husband brought home a couple of table runners from God knows where.  One was sheer with an autumn leaf pattern (it may actually be a dresser scarf), and it is just perfect for hanging across the top of the bathroom window. (I used nails and paper clips.) It ties together the colors of the wall, the piece of birch bark I hung up, and the towels. The other runner goes well with the armchair cushion, so I have it draped over the back of the chair at the moment. But I think I will end up using it to cover the top of a footstool that I am planning to build.

From the lumber motherlode, I built a small kid loft, about 3 feet in each dimension. I've been thinking about it for a while, but had to wait for the energy to carry it out. It was accepted with enthusiasm.

One of our plants was sitting out in plain view in a very unsightly thin plastic dish. I threw away the dish and replaced it with a warped cooking pan from the "Go Away box", until I can find something better.


Thursday, May 14, 2015

How to make a blank hardcover book, part 1

A few years ago, I went to a system where I write down all of the things that I am thinking about, or trying to remember, in a single hardcover blank book. So everything is arranged chronologically; I can usually remember when I was thinking about or working on something, and from that find my way back to it.

I've found since then that a book of about 200 pages will last me about 18 months. I am nearing the end of the second volume, and will need a new one soon.

Both of my first two blank books were handmade (by me), following the instructions in the Family Creative Workshop craft encyclopedia (from the 1970's) article on Bookbinding. I've looked around recently, but I haven't found very similar instructions online. That means its my turn, I guess. (I always appreciate when others have created well-written instructions, so I don't have to.) I am working from memory and experience here, because I no longer have the book that I learned from, so any errors in these instructions are my own.

So, Step 1:  Obtain paper for the blank pages. I prefer older blank paper, in the standard 8.5x11 inch size. This time I gleaned almost fifty sheets of nearly-blank sample papers from old graphic design magazines. The rest is grayish paper that my husband doesn't like.

Step 2:  Fold signatures.  Take six to eight sheets at a time, and fold them in half the short way. (Real paperworkers have a piece of rounded bone to flatten the fold well; I use a knitting needle.) This makes one signature.

Step 3:  Make sewing holes. First, you should know that there are two main ways of internally supporting the pages:  the first is with several narrow cords that all the signatures are sewn to; the other is with a smaller number of tapes. With cords, there is one sewing hole per cord. With tapes, there is a sewing hole on each side of each tape, plus (I think) an extra hole at each end of the signature. I use five cords, where each cord is a braid of linen or cotton string, so I have to make five holes. I make a template from scrap card stock that is the same length as the signature height, because the holes need to line up across signatures. Using the template, I pierce sewing holes in each signature in the crease (through all the sheets) with an awl; a large, sharp sewing needle would also work.

Step 4:  Make cords (if needed). As I said above, I braid thin linen or cotton string or yarn for the cords. Cotton has in the past proven not quite durable enough for the abuse that I put my books through, so I am using linen this time. Each cord needs to be long enough to reach around the spine of the book, with about three inches more at each end for gluing to the cover boards. Better too long than too short, at this point.

Step 5:  Improvise sewing frame, and hang cords/tapes. The frame holds the cords in place while the signatures are sewn to them. So there needs to be something to hang the cords from, something to attach the lower ends of the cords to, and something to support the signatures against the cords as the signatures are stacked and sewn. And your hands need to be able to get at both the front and the insides of the signatures. Previously, I built a frame with a platform, two sticks going up, a dowel bridging the sticks, and holes in the platform for the cords to go down into (with the cords secured underneath). This time, I took a child's step stool, turned it upside down, duct taped a dowel across the front legs, and used the underside of the step as the platform. I had to tie string to some of the cords to make them long enough to be hung this way, and then I duct taped the lower ends to the step. This worked well enough; the sewing goes quickly.

Step 6:  Sew signatures to cords. Waxed linen thread is preferred for this step; I used thin linen yarn...but I forgot to wax it this time. If I had remembered, I would have used an old candle to wax it as I went. Knot the end of the thread. Place the spine of the first signature against the cords. The needle goes into the first hole, along the inside of the fold, out the second hole, loop around the cord, back in the second hole, along the inside of the fold to the third hole, out the third hole, loop around the cord, the cord...and so on until the last hole, where it just comes out. Now put the next signature on top of the first one, and put the needle into the hole directly above the last hole stitched. Then the same pattern:  along the inside of the fold, out the hole, around the cord, back in, and along the inside to the next hole.

When you get to the last hole, bring the needle out. Now the thread needs to be brought down to catch the first signature, so that they are connected. The first time, the thread is brought down to loop around the knot. For the rest of the signatures, the needle comes down, behind the thread between the two previous signatures, coming out at the page edges, and up again to start a new signature. This is called a kettle stitch, if you want to look it up.

For tapes, the sewing is similar, but instead of looping around the tape, the needle comes out of the hole on one side of the tape, and back in through the hole on the other side.

When your thread runs out, tie a new length to it, with the knot falling inside the fold of a signature.

When all the signatures are sewn together, come out the last hole and make a knot.  Loosen the cords/tapes from the frame.

Step 7:  Gluing the "text block".  Put the block of sewn signatures between two scrap boards, with almost 1/4 inch of the spine and the ends of the cords protruding. Get the block as well lined up as you can before clamping the boards together, or putting it all in a vise. Brush a coat of white glue (I used Mod Podge this time because it is what I had on hand) over the folds of the signatures, and over the stitching. With a hammer, gently beat the glue into the spine, gradually rounding over the long edges of the spine to make the "shoulders" of the book. Put another coat of white glue over the spine. Leave it clamped while it dries.

That is where I am so far. The next step is to get the boards and covering material for the cover, which I will be looking out for on my next thrifting expedition this weekend. Old three-ring binders are a good source of the kind of hard cardboard that goes inside a book cover. I strongly prefer leather for the covering material. The other materials I can improvise from what I have.

Monday, May 11, 2015

Folding chair feet

A while back, I bought a folding chair from the thrift store; I think it cost $2. The only thing it lacked were the rubber tips for the feet. After rummaging through our doodads and scraps, I came up with a solution which used:

a piece of pipe that would slip over the ends of the chair legs
washers that would fit inside the pipe but not the chair legs
a stick (probably maple) from my husband's stash
double-sided tape

Pieces of the stick became the new chair feet, which I slid into sleeves cut from the pipe. The washers keep the inner ends of the sticks out of the chair legs. The double-sided tape went around the chair legs to help the upper ends of the sleeves stay on.

So the actual handwork was only sawing and filing and a little whittling. I used a hacksaw to cut the pipe, and rounded and smoothed the cut edges with a file (a metalworker's file; almost exactly the same technique as filing your nails). I sawed the stick with a regular saw, whittled it down to the right diameter, and rounded the edges at the end with the file as well. Then I put it all together, and the new chair feet are working well.

Thursday, May 7, 2015

The next big change

I am thinking hard about how to get a rug for the family room.  The challenge is, as always, in the constraints:

Time:  I want it in place within the next two months.

Money:  Within the next two months, I'll have at most $50 to put into a rug. (And no, I'm not going to go into debt for a rug!) Craigslist rugs start at about $100 around here.

Size:  It needs to be about 8 feet by 10 feet.

Texture:  It has to not present a tactile annoyance when I walk on it or sit on it. Wool is as scratchy as I am willing to go. Also, I am unwilling to deal with a rug that is shedding; my children shed enough craft scraps on the floor already.

Color:  It has to accept the beige and brick colors in the room, but also to transcend them.

Washability:  We have another round of potty training coming up in a few months.

Style:  I prefer patterns based on those found in nature.

There are many ways of crafting rugs traditionally:  braiding, hooking, weaving, crocheting, knitting.  Of these, I have braided, hooked, and crocheted rugs before.  Braided rugs wear well, but are time-intensive to make, and I don't enjoy the technique.  Hooked rugs (here I am talking about using a hook to pull loops of a strip of fabric up through a backing) are more creatively satisfying, but take even more time and materials. Crocheting a rug is relatively fast, but again it takes a lot of material, and the result is not easy to clean (or move, with a rug of that size).

Wool is my preferred material for any of these, because it is more durable, and because there is the possibility of mellowing or even of transferring the colors:  simmer the wool fabric (or yarn) in water with some detergent--use a large pot that you will never cook in again, because dyes are very toxic and bad for you--and a fair amount of the dye will come out into the water. Then put in a different wool fabric, and the water will dye it.

For less-traditional rugs, there are canvas dropcloths, which can be painted.  A dropcloth costs about $30-$40.  However, I don't like the texture of painted fabric, and in my experience, unpainted dropcloths will pill and look cheap under heavy wear.

So my top choice at the moment is to make a "floor quilt" out of upholstery scraps and samples, which I can get from ArtScraps for $5/grocery bag. This is what my patchwork couch cover is made of, so I took the cover off the couch and tried it out as a rug. The cover is made from less than one bag of scraps, and is about one-third the area of an 8x10 foot rug, so I would need two or three more bags full to turn the couch cover into a rug. Then I would need a new cover for the couch, which would have to be in a single solid color or (more likely) a subtle print, to keep the room from being too visually busy.

A dropcloth that is lightly painted and stenciled would be my second choice. Complicating the decision is the upcoming YMCA Garage Sale, which on its final day sells things by the bag and by the grocery cart...so I could perhaps buy a heaping cartful of clothing (for about $35) to recycle into a crocheted rug.

Tuesday, May 5, 2015

Small changes

I moved the curtain rod in the school room up as high as I could. This lets in a little more light, and makes the windows look taller. It didn't take long, either.

Last weekend I made more things to go on the walls:  a paper twist from an off-white paper sample for the dining room, and a chain of three small wire wreaths to go in the bathroom.

A while back, while I was looking in the scrap pile for wood to make a shoe rack for the coat closet, I found an old crate that we weren't using that was just the right size.

I used leftover tablecloth fabric from making skirts to make pockets for some of my other skirts; simple bags sewn to the inside of the waistbands. I'm not a purse person.

I salvaged a simple Ikea lamp that my husband was going to throw away, and I'm in the process of painting and rewiring it; I found a new cord (with socket) at the Habitat for Humanity ReStore for $3. When it's finished. it will go in the school room, which only has an overhead fixture at the moment.

Monday, May 4, 2015

Not changing a light fixture

Remodeling and redecorating over the years have turned this house's original dining room into a dark, awkward, and inconsistent space in the center of the house.  Its most glaring inconsistency is that a nice ceiling medallion is paired with a standard ceiling fan with lights. (The house has air conditioning.) We use this space for eating only because it is closest to the kitchen and relatively easy to clean, with linoleum flooring.

I've been thinking of taking down the ceiling fan and (until the end of our lease) replacing it with a more appropriate fixture. I found that the nearest Habitat for Humanity ReStore had one for $15 that would work, after repainting. But I decided against it:  it would require more effort than I want to invest into it at this stage in my life, particularly without having an able-bodied helper. Also, the medallion doesn't seem to be very well attached to the ceiling, and might better be left alone.

I did give the fan a dusting, and took down the glass fixtures to wash them (something that no one had done for a very long time). I also bought four matching light bulbs for it; previously there were two very different kinds. I learned while buying bulbs that some decorative bulbs are not designed for use in downward-pointing fixtures, and that the ones that are are more expensive. The cleaning and new bulbs made a noticeable improvement.

Wednesday, April 29, 2015

Diaper covers for the HE washer

The washer in this house is a fancy Samsung HE (high efficiency) washer that cannot be used to wash things that are waterproof, such as diaper covers. So I found a glass washboard at an antique store, for $14--about half the price that I have ever seen one for sale--and have been using that to wash diaper covers by hand. The washboard is a big help for the covers that need scrubbing. (Glass washboards were preferred over metal ones in the old days, though I forget why.) With the washboard, it takes me about ten minutes twice a week to wash my toddler's diaper covers.

With a new baby, I will be washing diapers three times a week instead of two, and will have a much harder time finding ten or fifteen minutes for handwashing covers each time. So I have been preparing to switch back to wool covers, at least during the daytime, and to machine wash them (see below).

For wool, I had a small amount of wool yarn leftovers, and four old, stained, and shrunk cashmere sweaters that my mother-in-law passed on to one of our children. This child made an honest attempt to appreciate the qualities of cashmere, but fundamentally just isn't a sweater person. Only one of the sweaters was in good enough condition to donate, but they were all too good to throw away.

For diaper cover patterns, I looked at the plastic-pants-style covers that we had, and measured them, then drew up paper patterns.

I used the yarns, in a double strand because they were sock weight, to crochet most of one diaper cover.

Then I cut as many cover pieces as possible from the sweaters, and then stitched the larger scraps together patchwork-style, and made more pieces from those.  I put elastic around all the waist and leg openings, which cost about $5. All together, the four smallish sweaters plus the crocheted yarn piece yielded four large covers, six medium, and five small. The cashmere is soft and beautiful. With the wool covers that I have from before, which will be usable with the addition of a little elastic, this gives me enough to use wool covers full time, if need be.

For water repellency, wool covers do much better if they contain some lanolin; lanolizing instructions here.  Also, generally handwashing (and only occasionally or when poopy) in lukewarm water with air drying is strongly recommended for wool covers, to prevent them from felting and shrinking. But what I have actually done in the past is to skip the lanolin, wash the poopy wool covers in both cold and hot water right along with the diapers, and hang them to dry with the other diaper covers.  Most of them felted and shrank (some wool won't, even if you try), but that gave a nicer density to the cover material, and only some of them ended up too small. This batch of diaper covers runs large and roomy, and most of the material has already been shrunk, so I'm not worried about shrinking. But I may start handwashing them once the baby gets into the medium size, just to keep the cashmere from wearing out too quickly. My babies don't stay in the small size for very long.

Tuesday, April 28, 2015

Baseball cap

Once upon a time, I had a baseball cap. And I wore it out. I took it apart with a seam ripper, rescued the plastic from inside the bill, and used the pieces as a pattern to make myself a new cap in a more feminine fabric. That one also wore out, eventually. I rescued the bill again, and threw the rest away. When I got to sewing another one, I measured my head, drew up a pattern from measurements and memory, and made a new cap with interesting fabric from my modest fabric stash. I had one of my husband's caps for reference, for the tricky parts like how to attach the sweatband. (Even then, I sewed it on wrong the first time.)

The lowly baseball cap is both simple and intricate in construction at the same time; I find sewing my own to be moderately challenging. The main body of the hat is six "fat triangles" of equal size, sewn together. The seams are covered with a seam tape, which is topstitched. At the top, a button covered with fabric is attached where the tips of the triangles meet. At the back, a semicircle is cut out from the bottom of one triangle, and two straps are attached; in my hats I connected these with a buckle, or just by tying them together. The sweatband is a folded piece of fabric that is stitched to the bottom edge of the hat, and then folded up inside. The bill is a piece of plastic or cardboard between two sewn layers of fabric, then several lines of stitching go through all the layers. The bill is attached to the rest of the hat by stitching. Precision at every step pays off.